
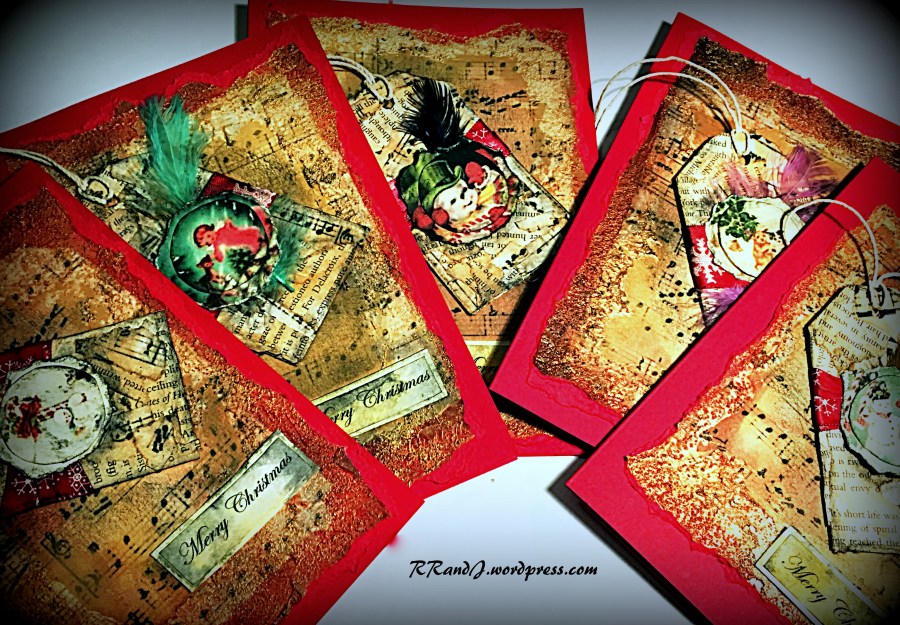
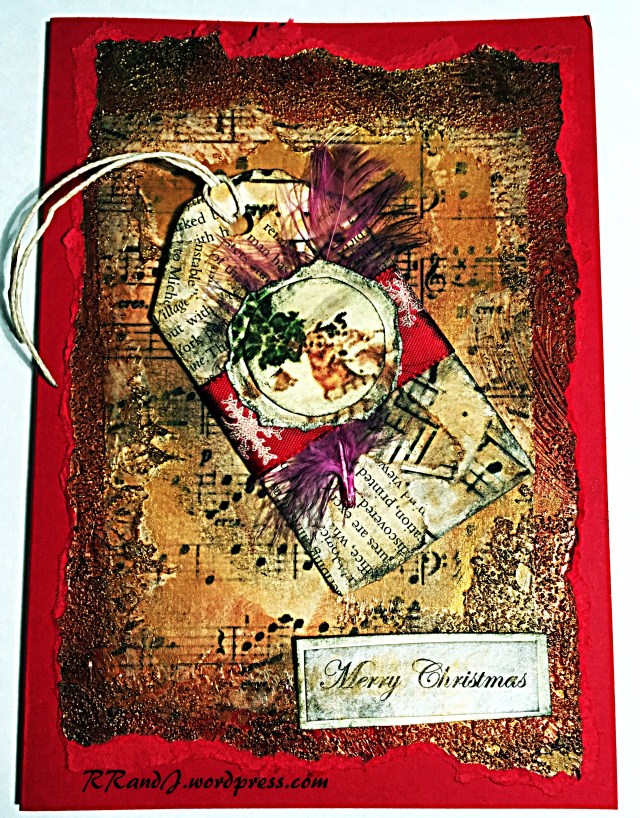
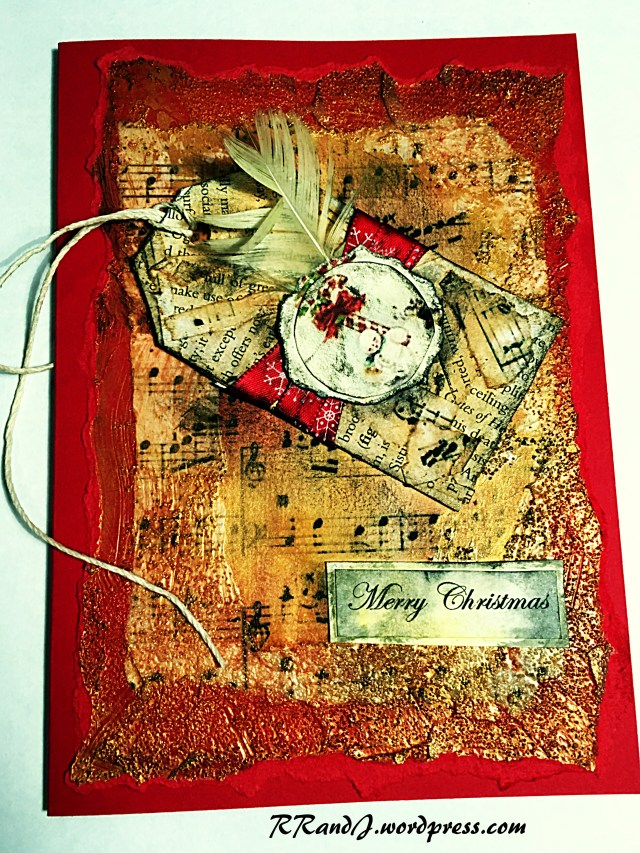
Today I am doing something a bit different and I am going to try my hand at doing a Christmas card tutorial of sorts to show you how you can make a card similar to the ones shown below.

To make these cards you will need:
Plain card in the colour of your choice (I used red)
Pre-folded blank cards in a matching colour (or you could make your own from extra pieces of card)
scrap cardboard (I used an old cereal box)
Christmas papers (I printed off my own music sheets from pinterest HERE)
old book or magazine pages
string
Christmas ribbon or ribbon in the colour of your choice
Christmas Ephemera (I used feathers and some vintage printable images you can find HERE)
Modge podge or watered down PVA glue
Water colour paints or tea bags
black ink
Metallic gold paint
Grainy Gel medium
spatula or palette knife
This is a rough guide and of course you can amend these cards to your own needs and add in or take out processes as you wish so you can use the things you may already have at home.
Step one

Cut your card stock to the same size as your pre folded card. Using your Christmas paper (or your music sheet as shown) make a piece that is around 2-3cm smaller than the front of your card) and tear the edges so you have a rough edge all the way round.
 Stick this to the front of your card stock roughly in the centre with your glue and smooth down.
Step Two
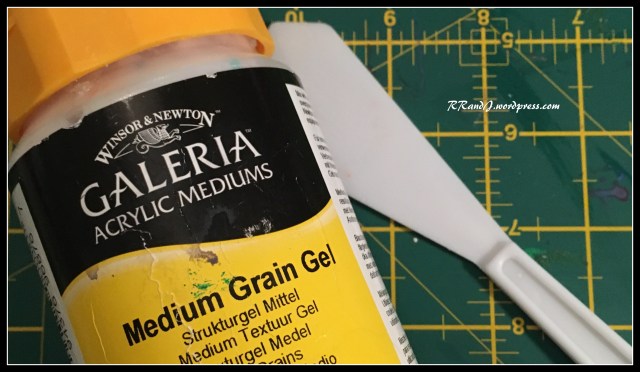
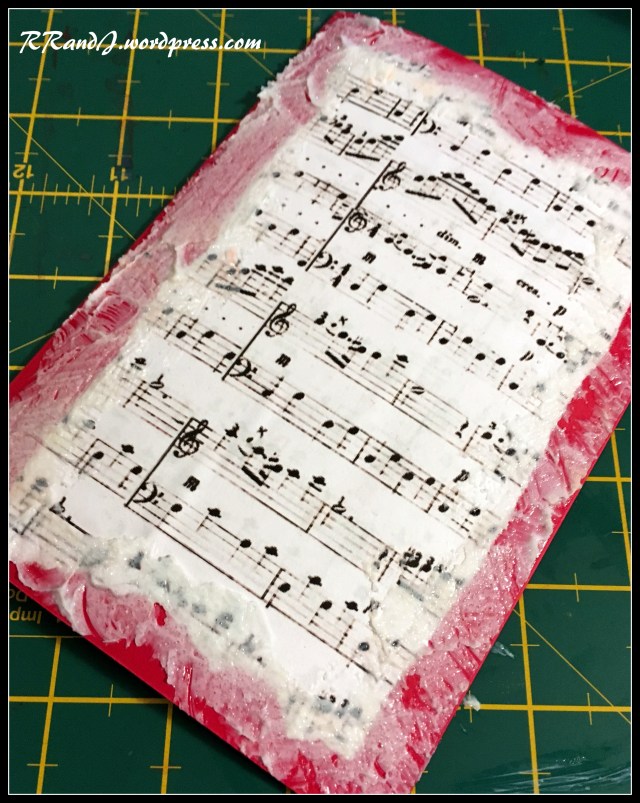
Using your Textured gel medium and a spatula or palette knife smear gel medium around the edge of your Christmas/music paper like in the image below, leaving the centre as clear as possible- don’t worry about being too neat here, the rough edges add to the effect. Leave to dry (or dry thoroughly with a hair dryer like I did if you are impatient like I am!)
Step Three


Whilst the gel medium is drying you can make your tag, I used some old cereal box to make a prototype tag that could be used to draw round and make several tags of a similar size. Cut out your tag shapes using the old cardboard then using bits of torn up music sheets/ Christmas paper and pages from old books glue these bit all over your tags and allow to dry. Cut round the edges if there is any paper overlapping when dry so you have a nice neat tag shape.
Step Four
When all of that is dry now you can stain the tags and the card stock using either watercolour paints or tea bags depending on what you have available giving the music paper/Christmas paper and tags an aged look. Paint or tea stain over the dried gel medium as well. Then leave to dry (or blast dry with hair dryer.)


Next, using a dry paintbrush and some metallic acrylic paint ( I used gold paint from docrafts which you can purchase from Amazon HERE or I got mine from The Range) brush a light layer of gold paint all over your gel medium, don’t worry too much if some gets on your Christmas/music paper but ensure it is well blended, you dont need a lot of paint, just a very light covering.


Step five
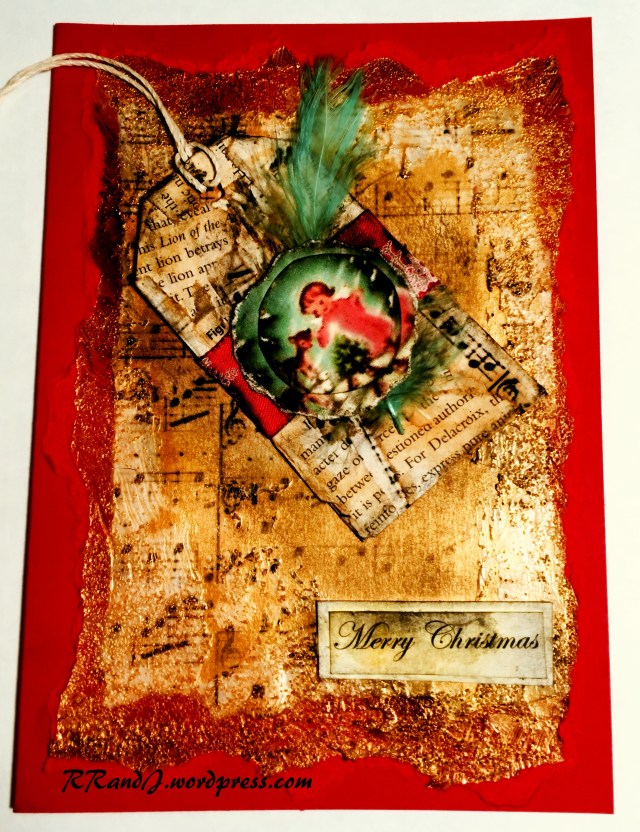
While that’s drying you can decorate your tags. Punch a hole in the top and thread through some string. I decorated mine by wrapping them in Christmas ribbon which is stuck down with double sided tape, and embellished them with feathers, buttons (which I later removed because mine were too bulky for posting but flat buttons would work just as well) and with vintage images from the collage sheets I printed off from Pinterest (see list at top of page for links). I then went round the edges with black stamping ink and a soft brush to make them look tarnished or weathered.
When you have finished, stick your tag to the front of your dry card stock, and if you like. using the black ink pad and soft dry brush, lightly tarnish the now metallic gold gel medium. Ensure all is completely dry before moving on to the next step.

Step Six
Next you need to rip around the edges of your finished decorated card stock, this may be quite tough so take your time! Stick it on to the front of your pre- folded card. Then if you wish add a Happy Christmas or Merry Christmas message to the front (I just printed mine off the computer and backed them onto card, then stuck them to the front of the card and tarnished them with the same method as the rest of the card)  Then you will be left with Cards like the ones shown below! If your cards are a bit warped with all the glue and mediums, just put them under something flat and heavy to flatten them out for about 15 minutes.


Hope that tutorial gave you some inspiration, let me know if you gave it a go yourself!
Discover more from Mushroom Moon Designs
Subscribe to get the latest posts sent to your email.

I love this think its amazing and your very good at it xx
Thanks! Let me know if you have a go at something similar! X
love it! -even the pieces by themselves – the card and tag as standalone are wonderful, combined its icing on the cake!